Connecting to Lyft's SFTP service for automatic syncing
Learn more about Lyft's Secure File Transfer Protocol (SFTP) service and how it offers a secure and scalable way to automatically manage your people, expense info, and reports.
In this article, we'll cover:
Note for administrators: This guide contains technical instructions for your IT team to set up SFTP connectivity with Lyft Business. Please share this documentation with your IT department or technical staff who will be implementing the connection.
How to connect to Lyft's SFTP service
Employee management systems with SFTP functionality, such as Oracle and Workday, can be easily connected to the Lyft Business Portal. To use automatic syncing features and connect to Lyft's SFTP server, follow the below steps:
Step 1: Generate your SSH keys
Think of these keys as digital passwords that keep your connection secure. Your IT team will need to make these keys. Here's how:
On Mac/Linux systems:
1. Open the Terminal program (you can find this program by clicking on Launchpad (or press F4) and search for Terminal)
2. After opening the terminal, type this: ssh-keygen -t rsa -b 4096 and press 'Enter'

3. You will be asked to input a file path location to save your SSH private and public keys. If you want to name the file and the path, input it here and press Enter. If you are okay with the default path and name for your SSH key (example: /Users/example/.ssh/id_rsa) and don't want to make any changes, press 'Enter'

4. You will be asked to enter an (optional) passphrase for your file. If you choose to create a passphrase, input it in the Terminal and press Enter. However, you will have to remember it every time you connect to Lyft's SFTP server. If you choose to not create a passphrase, leave it blank and press 'Enter'

5. You will be asked to reenter the passphrase to confirm. If you created a passphrase in step 4, input it again in the Terminal and press 'Enter.' If you did not create a passphrase, leave it blank and press 'Enter.'
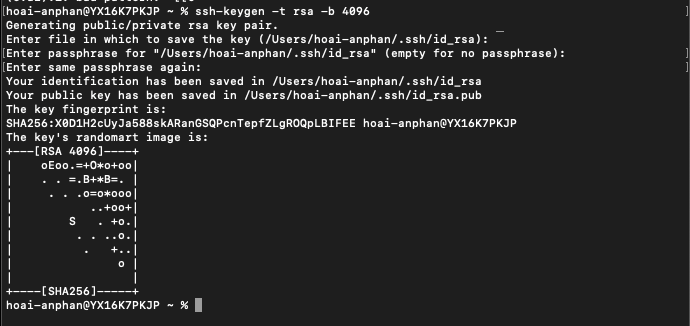
6. You have now successfully created SSH keys and saved them in your system. To open the folder with the SSH keys:
- If you chose a file path and name in Step 3, type: open and press Enter
- Example: in Step 3 you chose ~/Documents/Lyft-SFTP/ssh-keys/lyft_key
- Here you will type: open ~/Documents/Lyft-SFTP/ssh-keys/
7. If you chose the default file path and name, type open ~/.ssh/ and press Enter. For Linux, use xdg-open ~/.ssh/ of equivalent command

8. The system should open up a folder, or you can navigate manually using any file explorer. Locate the 2 files you created from Step 3, or the files called "id_rsa" if you used the default name from the command. To set up SFTP you'll only need the public file, identified with the .pub suffix. For example id_rsa.pub or .pub. Once you locate it, don't close this window and go to the next section: Set up SFTP connection.

On Windows systems:
1. You can use any open SSH client. This example shows how to do it with PuTTY. Download and install PuTTY and PuTTYGen from this website.
2. Open the PuTTYGen program. Select 'RSA' as the type of key to generate.

3. Enter 4096 in the 'Number of bits in a generated key' field and click on 'Generate'
4. Follow PuTTYGen's instructions to create the key
5. Click 'Save public key' to save it as a file on your computer
Important: You'll use the private key on your computer and enter the public key into the Lyft Business Portal.

6. Copy the contents of the 'Public key for pasting into OpenSSH authorized_keys file' from PuTTY and paste it into the Lyft Business Portal. Make sure to scroll down to copy all of it.
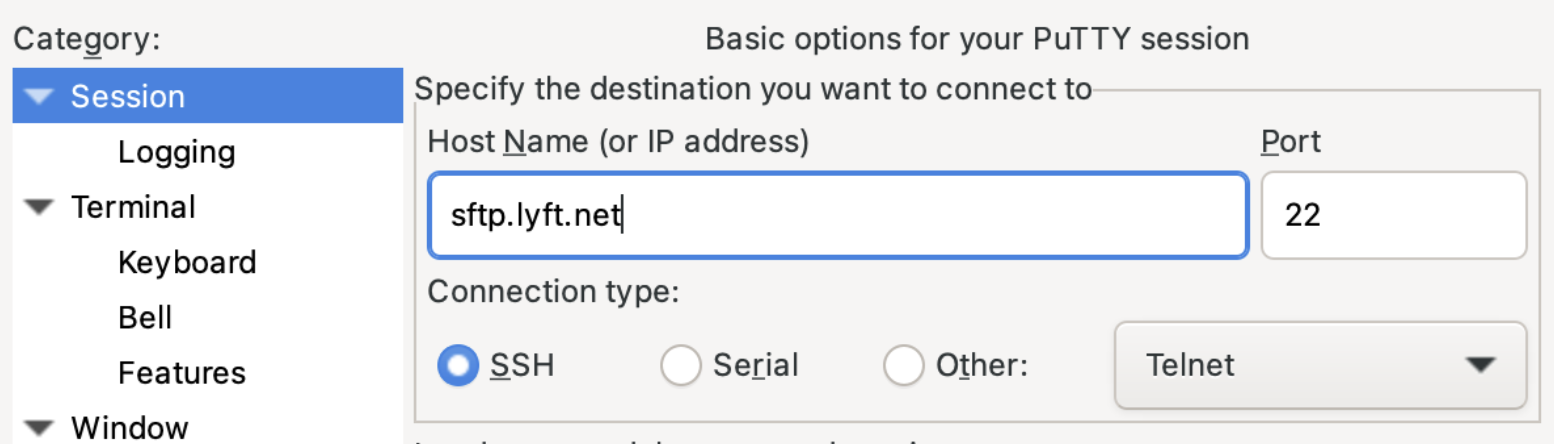
7. Open the PuTTY program
8. Add the connection details
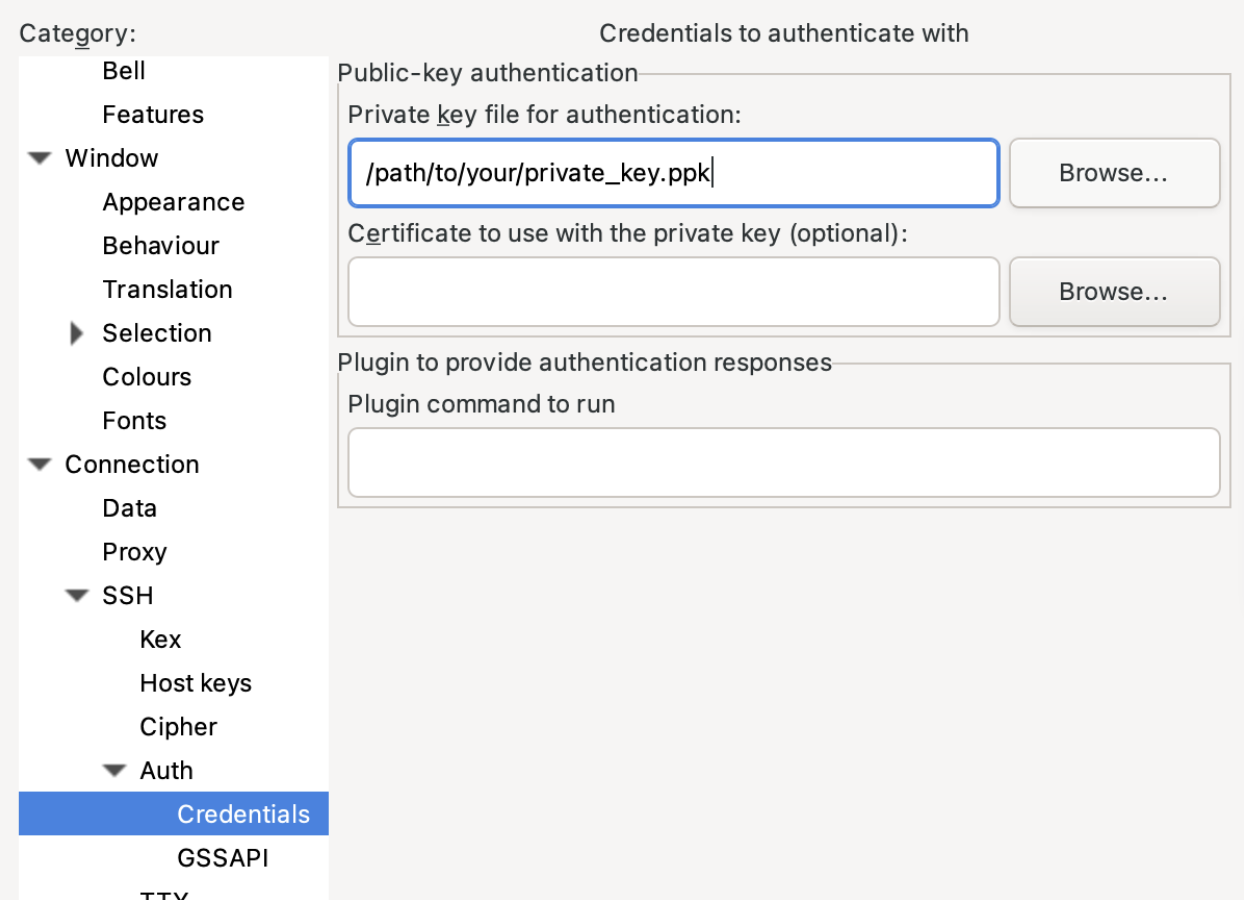
9. On the sidebar click on "Connection", then "SSH", "Auth", and finally "Credentials"
Step 2: Set up SFTP connection
1. Log in to your Lyft Business Portal
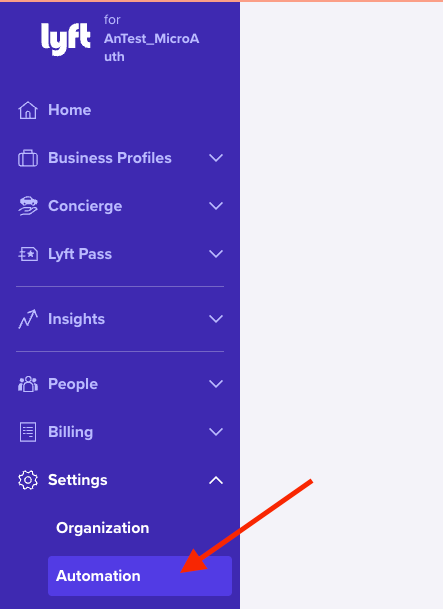
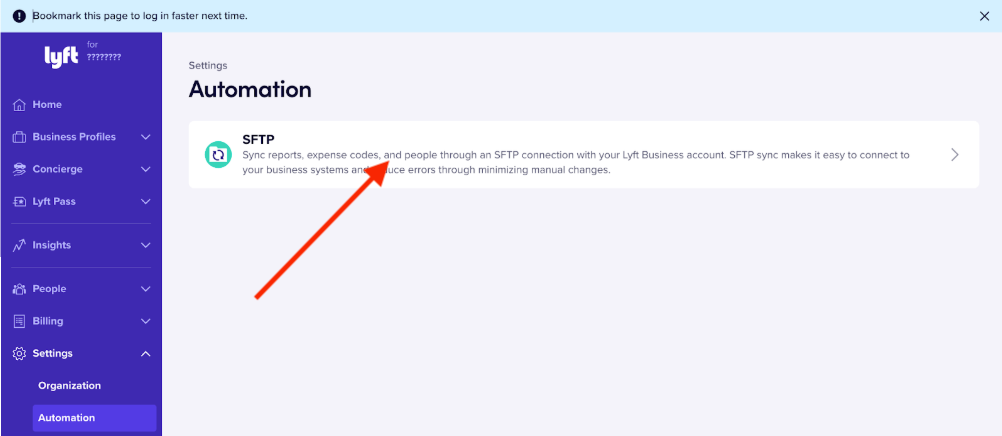
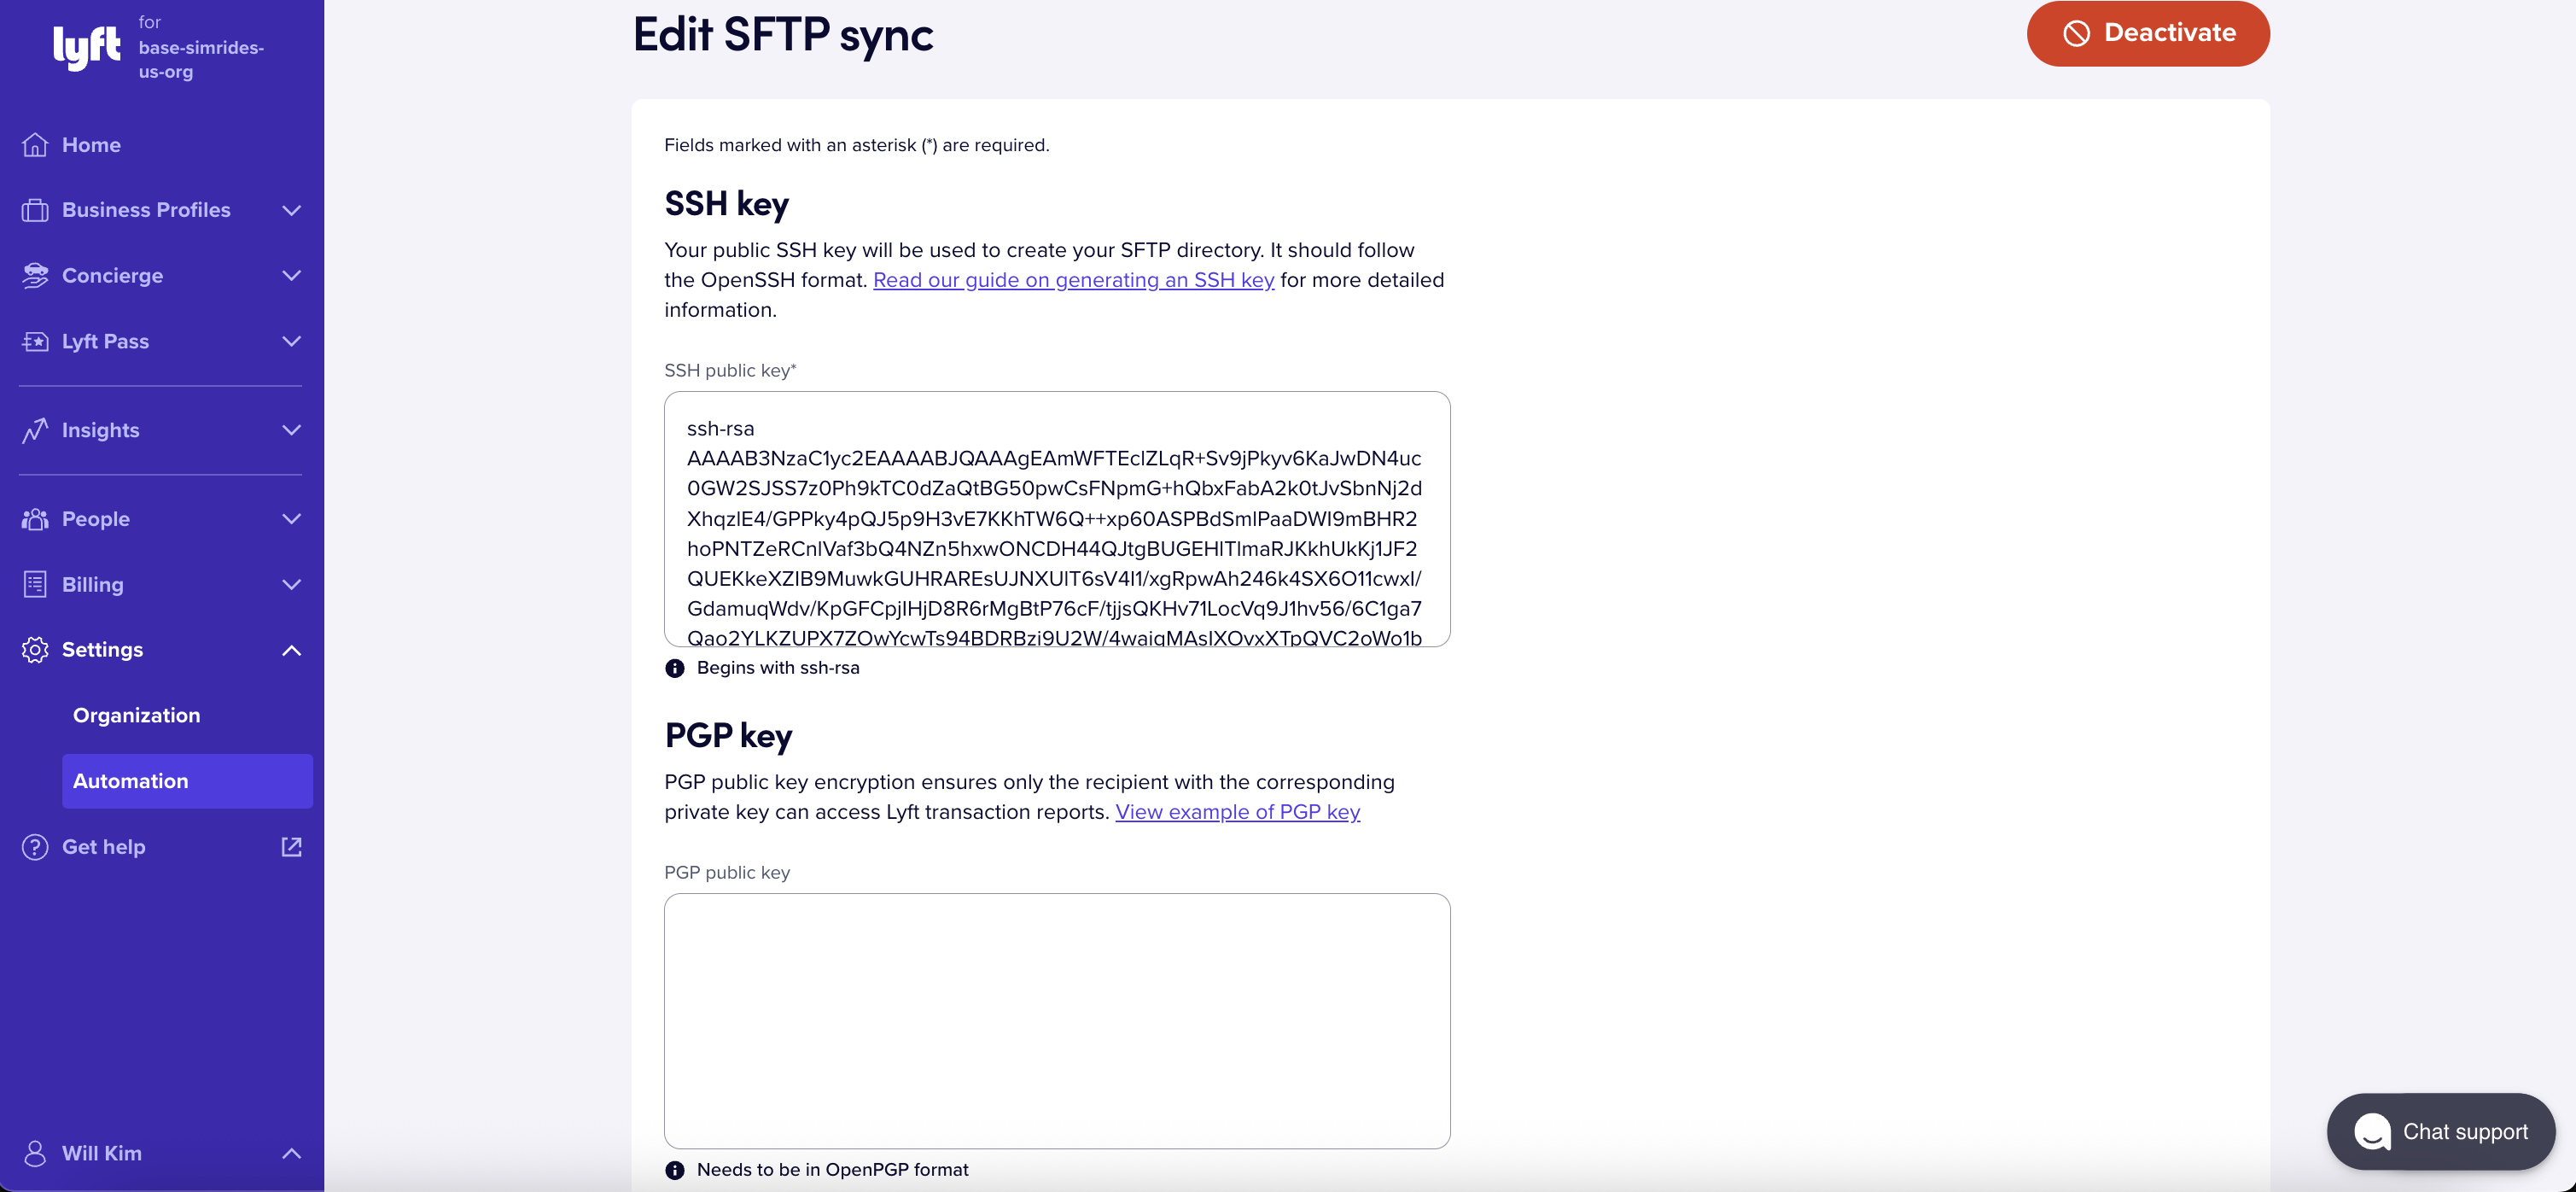
2. Click 'Settings' from the left-hand sidebar and select 'Automation'
3. Click the SFTP card in the main screen to start setting up your SFTP sync
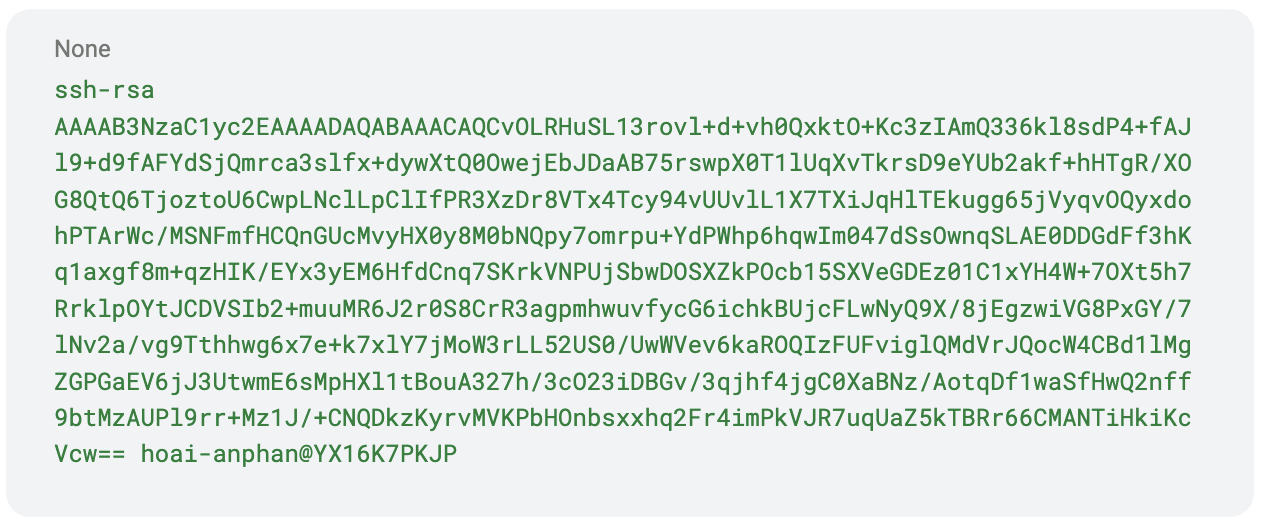
4. Paste the SSH key in the SSH public key textbox. Go to the folder where you saved your SSH key on the Generate your SSH keys step. Right click on the id_rsa.pub file and choose Open With -> TextEdit.app or any other text editor program. Copy the whole content of the file and paste into the SSH key textbox. Its format will look like this:
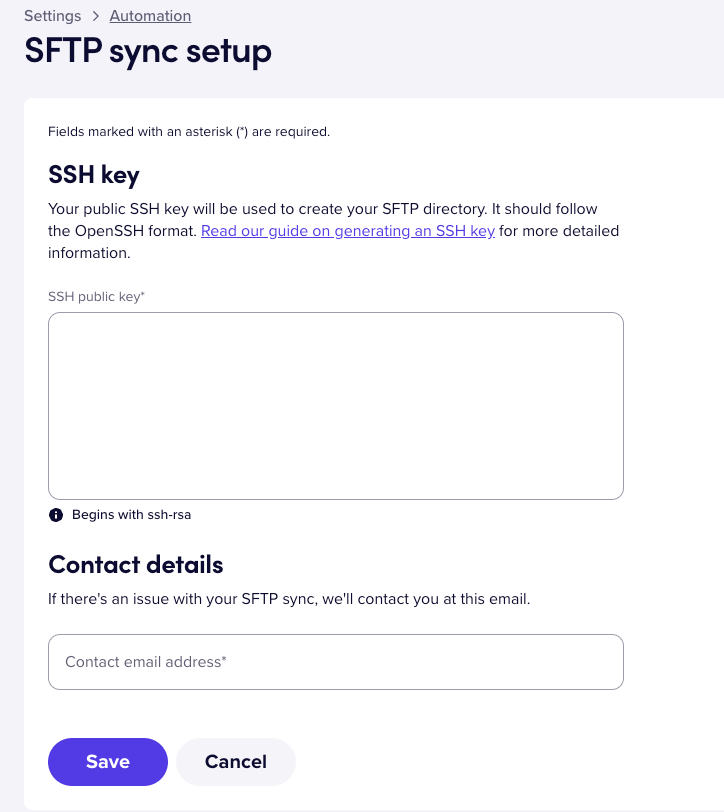
5. Enter the IT department's contact email for technical issues in the 'Contact details' field. If you don't have an IT department, enter the email of someone who can best solve issues regarding the SFTP connection and employee roster files.
6. Press the Save button. A green alert will appear confirming 'SFTP settings saved.'
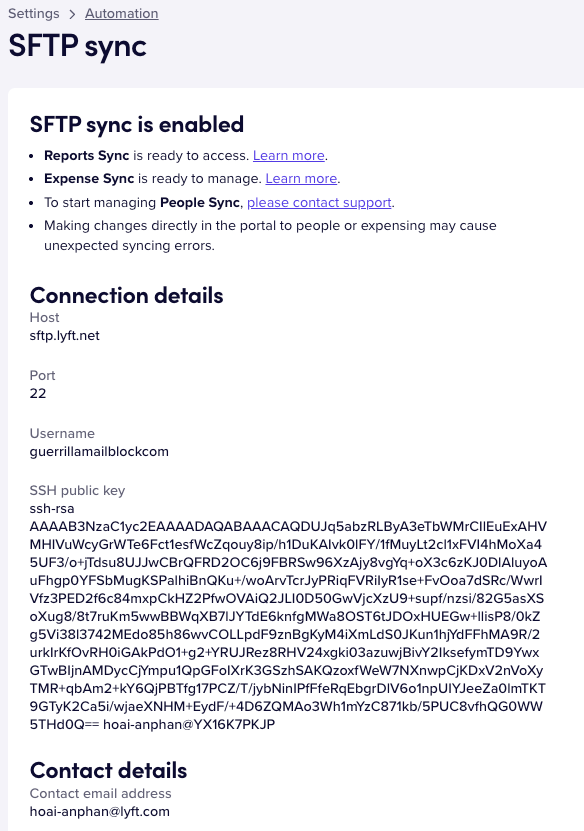
You have successfully set up your SFTP sync and will see a screen that has a host name, port number, username, SSH public key and contact details, similar to the one below. You will need this information to continue the SFTP set up in later steps.
Step 3: Test SFTP connection
1. Go back to your Terminal program and run the following command line to test the connection to the Lyft Business portal: sftp -v -o "IdentitiesOnly yes" -F/dev/null -i [PRIVATE_KEY_FILE] [SFTP-username]@sftp.lyft.net and press Enter
- [PRIVATE_KEY_FILE] is the path to your private SSH key
- [SFTP-username] is the username in the Lyft Business Portal
- Example: sftp -v -o "IdentitiesOnly yes" -F/dev/null -i ~/.ssh/id_rsa guerrillamailblockcom@sftp.lyft.net
- Verify that the 'Server host key' matches ssh-rsa SHA256:iwGSCokiIJOCp5L5Vi+9UVLR0ktLxNifI6kA89rB8UA
2. After successfully connecting to SFTP, you will see the below screen. If you cannot connect to SFTP, refer to the Frequently Asked Questions section for troubleshooting.

Step 4: Upload your files to SFTP
You can upload your employee_roster.csv file to SFTP by using the command line in Terminal or by using a third party file uploader such as CyberDuck or FileZilla.
This example below uses CyberDuck to upload the roster to SFTP remote server.
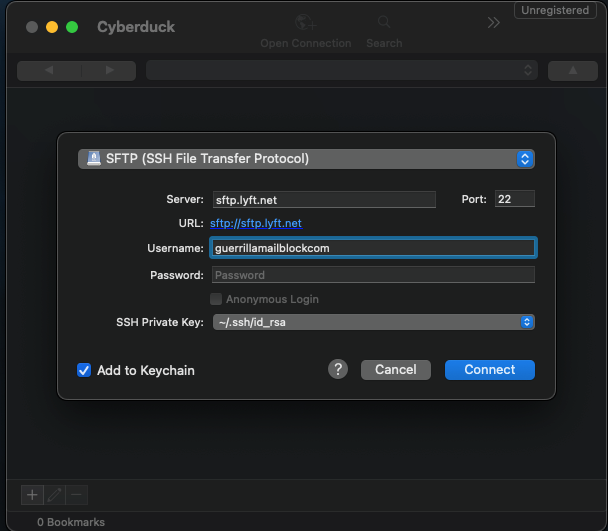
- Open the CyberDuck program and choose 'Open Connection'
- Choose 'SFTP (SSH File Transfer Protocol)' from the drop down menu
- Enter the following information
- Server: sftp.lyft.net
- Port: 22
- Username: Your SFTP username in the LBP
- Password: If you have chosen a passphrase when generating an SSH key, input that passphrase here. If not, leave it blank.
- SSH Private Key: Choose your private SSH key file
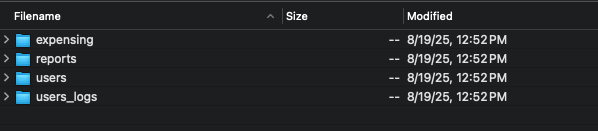
After clicking 'Connect', you'll see folders like these:
- /users/ Drag and drop your employee_roster.csv file here. (Note: You might need to ask your Lyft Sales / Account Manager to turn on People Sync first)
- /users_logs/ This folder shows the result of each time your SFTP people sync runs. You can find logs of errors here if there is any problem with the sync.
- /expensing/ Put your expense information here
- /reports/ This is where you'll find automatic reports from Lyft. Don't put anything in this folder.
Once connected, your organization will be enabled to use the following automatic sync products: People Sync, Expense Sync, and Reports Sync.
PGP encryption for SFTP transaction reports
Organization administrators also have the option to add and manage their own PGP public key directly through the Lyft Business portal. This key offers enhanced security, which is especially helpful for users with strict data protection policies. Users can add their PGP public key by logging into the Lyft Business Portal and selecting 'Settings' then 'Automation' on the side menu bar. This feature is available for all Lyft Business customers with SFTP-enabled transaction reports.
PGP public key example
FAQs
Why do I see an error message "Something went wrong. Please try again." when I set up SFTP connection?
It is necessary for Lyft's SFTP server to overcome your firewall to build a successful connection. If your firewall blocks the server, then you may see an error message stating: "Something went wrong. Please try again."
If this occurs, you need to whitelist the static IP 3.225.63.165 for port 22. After that, follow the below steps to run a test and recheck if your organization's firewall is still blocking Lyft's SFTP server:
1. Connect to host: sftp.lyft.net
2. Connect to port: 22
3. Run the following command line to connect: sftp -v -o "IdentitiesOnly yes" -F/dev/null -i [PRIVATE_KEY_FILE] [SFTP-username]@sftp.lyft.net
- [PRIVATE_KEY_FILE] is the path to your private SSH key
- [SFTP-username] is the username in the Lyft Business Portal
- Example: sftp -v -o "IdentitiesOnly yes" -F/dev/null -i ~/.ssh/id_rsa guerrillamailblockcom@sftp.lyft.net
4. Verify that the host key signature matches ssh-rsa SHA256:iwGSCokiIJOCp5L5Vi+9UVLR0ktLxNifI6kA89rB8UA
If the tests have completed successfully, your firewall settings are all set for a secure connection!
Why do I see the error message "SSH key must adhere to OpenSSH format"?
Lyft only accepts a specific type of key (RSA public key in OpenSSH format). Make sure you're using that type or you may see the error message: "SSH key must adhere to OpenSSH format."
See an example of a valid OpenSSH key below:
AAAB3NzaC1yc2EAAAABJQAAAgEAmWFTEclZLqR+Sv9jPkyv6KaJwDN4uc0GW2SJSS7z0Ph9kTC0dZaQtBG50
pwCsFNpmG+hQbxFabA2k0tJvSbnNj2dXhqzlE4/GPPky4pQJ5p9H3vE7KKhTW6Q++xp60ASPBdSmlPaaDWI9
mBHR2hoPNTZeRCnlVaf3bQ4NZn5hxwONCDH44QJtgBUGEHlTlmaRJKkhUkKj1JF2QUEKkeXZIB9MuwkGUHRA
REsUJNXUlT6sV4I1/xgRpwAh246k4SX6O11cwxI/GdamuqWdv/KpGFCpjIHjD8R6rMgBtP76cF/tjjsQKHv71LocVq
9J1hv56/6C1ga7Qao2YLKZUPX7ZOwYcwTs94BDRBzi9U2W/4waigMAsIXOvxXTpQVC2oWo1bBjS0aPk33kqE5Z4
lvt/c7s+ErAtrTTt0VRvYarTKBBF8/gbOXfODRXtWmKLoXP2SA0T1csLfRB0tU+DLufgSBj+xHiuhnETl5qwRqSm0w7
mUOeh+x8sfdkmS01uxeSbMb24k6ceXrUe6Qiuz7IMl25xkrpz8q1B4wYgqF2blTl/Aeg8q/sWHrkuVJS+yeiCqgL59
Pw15gsp5t6QaXsGFIBa+I2SJjNY7VLKY3tbouBzMLKwQBQ4pu9E/+Dfrz0PUW79nQvAae2LrHzJMoU/FxGxS35
Gm7NkQG58IdfKU= rsa-key-20201029
Does the People Sync react every time a new CSV is uploaded?
Lyft checks for updates to your employee roster on a daily basis. This means that while you can upload your employee_roster.csv file as often as you need to, the sync will not necessarily react every time a new file is uploaded, as the system has a set schedule for checking updates.
Is it true the sync engine might ignore the CSV if it specifies a large overhaul?
Yes, that is true. If a newly uploaded CSV file would cause a large and unexpected change to the employee roster, such as a large number of employees being removed from the Lyft Business account, the system will pause processing the file. You will be asked to confirm if the changes were intentional in an email from Lyft. If they were, you must contact Lyft to move forward with the processing. If the changes were not intentional, you will need to fix your CSV file. This issue is associated with the "High Cancels" error message in the /users_logs/ folder.
If a fresh file isn't uploaded daily, will it cause any disruption?
No, it will not. The system will just use the existing file and detect no changes to your employee roster.
How do I get the People Sync log file?
You can get the People Sync log file by accessing the /users_logs/ folder in the SFTP directory. The log file keeps you updated on the processing status of your file and can help you identify why the sync is failing.
Your organization's IT contact will also receive an email alert if People Sync encounters issues that prevent a successful sync. If the sync was successful, a record will appear in your log, but you won't receive an email alert.
What username should I input?
After successfully enabling SFTP syncing, Lyft will provide you with the SFTP username, SFTP address, and port number in the Lyft Business Portal. You will need to use this information for all future connections to the SFTP server.
SFTP Address: The address for Lyft's SFTP server is sftp.lyft.net
Username: The username is typically your domain name without the dot, and it is provided by Lyft in the portal after SFTP syncing is enabled
Port: The port number is 22
Directories: The SFTP directory contains the following folders:
- /users/: This is where you upload your employee_roster.csv file for People Sync
- /users_logs/: This folder contains logs showing the results of your People Sync runs
- /expensing/: This is where you put your expense information files, such as expense_codes.csv and expense_notes.csv
- /reports/: This folder is read-only and contains automatically generated reports from Lyft. You should not upload any files to this folder.
Where do we find Program IDs? We want to set up a segmented roster sync and need to specify which program each employee gets enrolled to via program ID.
At the moment you will need to contact your Lyft Sales or Account Manager to get this information.
If you are experiencing an issue that is not found in this article, please contact us for support.